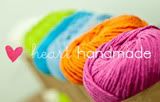
Much Love Monday
Hello one and all, hope you all had a wonderful weekend!!I just got back from traveling around in a tow truck....lol!! Too much fun in one day! Our car broke down in the middle of a round about, we lost all power steering so I had to get out and push the car around the corner. A lovely police woman stopped traffic for us and yelled out the window "sorry I can't help you push but I have a broken toe"....just what I needed to hear whilst nearly peeing my pants from pushing the monster of a car......well it felt like a monster! The tow truck driver asked Mum and I if we would like a lift home so we took him up on his offer. As we were climbing up into the cabin he got a call through to go pick a trailer up so we went along for the ride.....he was such a lovely man, real chatty. Told us about his travels around Australia in his caravan, what days he works, who owns the tow truck.....you know, secret men's business....lol! At least we had fun......
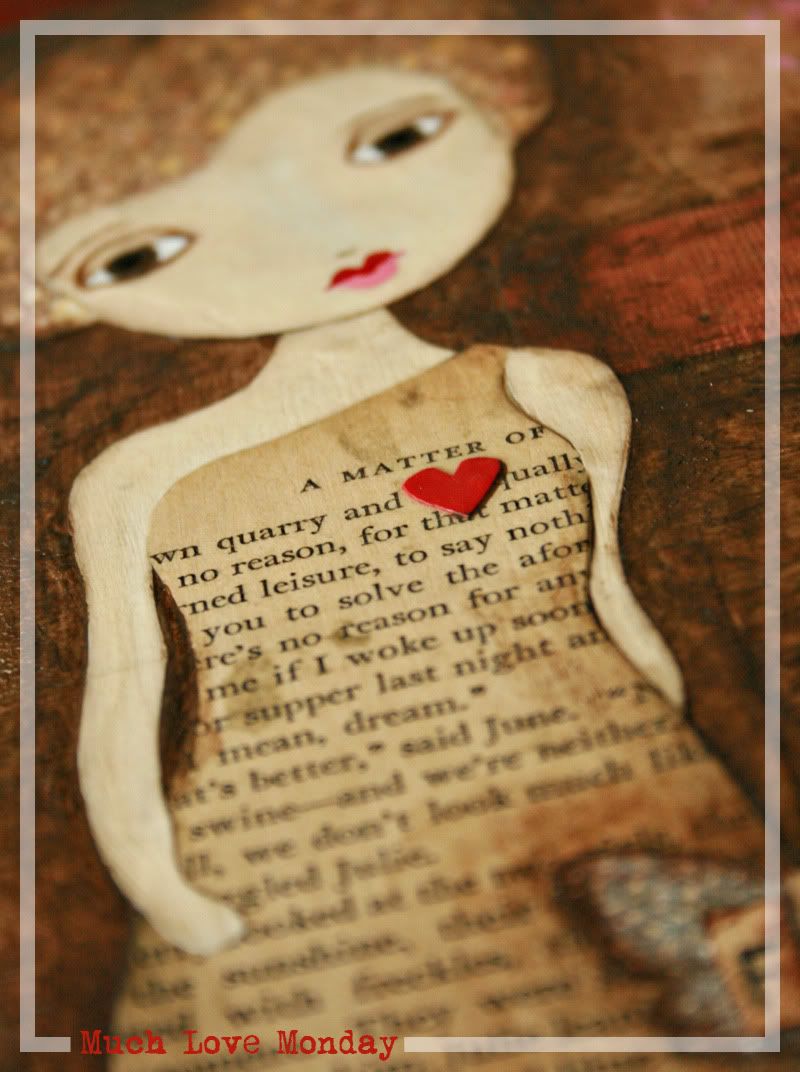
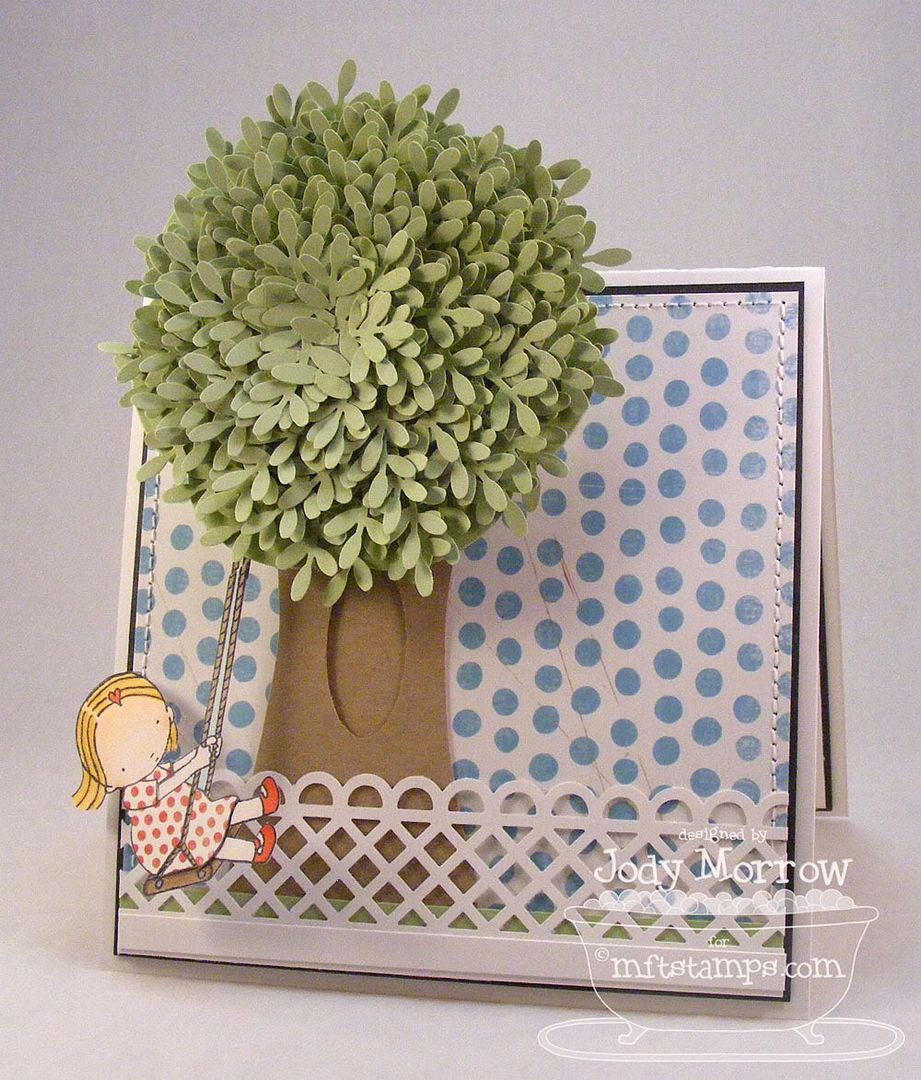
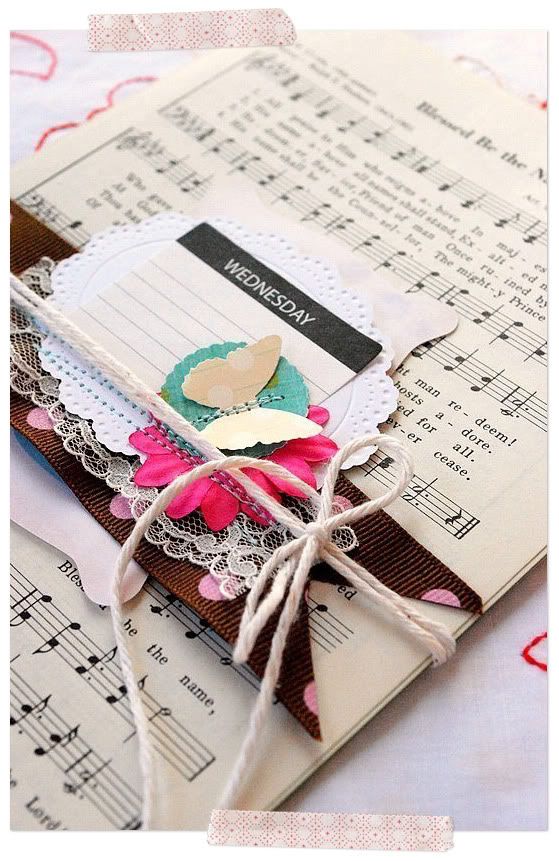
Here is my entry into Much Love Monday....

I ♥ Sunday
Some happy link lovin' on a rainy/overcast Sunday afternoon with my yummy hot latte, my fluffy slippers { yes it's getting cool here in Australia so just go with me } listening to Kyle and Jackie O { fav. radio hosts 2dayfm }
I want to start today's ♥ links off with an awesome store I recently discovered thru my mindless blog hoppin' called Emersonmade. The flowers that Emerson make are so beautiful and delicately made I could hardly believe my eyes when I was browsing thru the store. Here are just a few of my fav's:
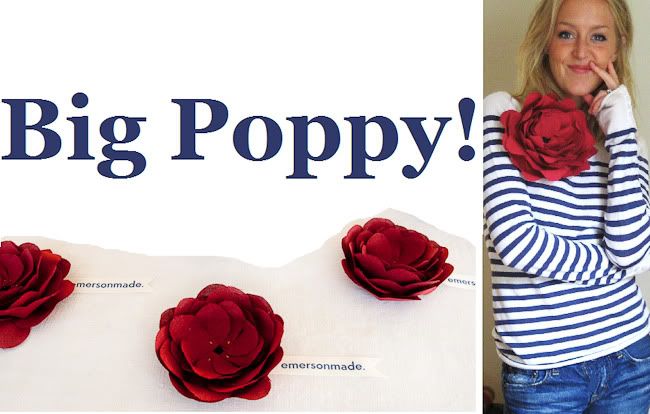

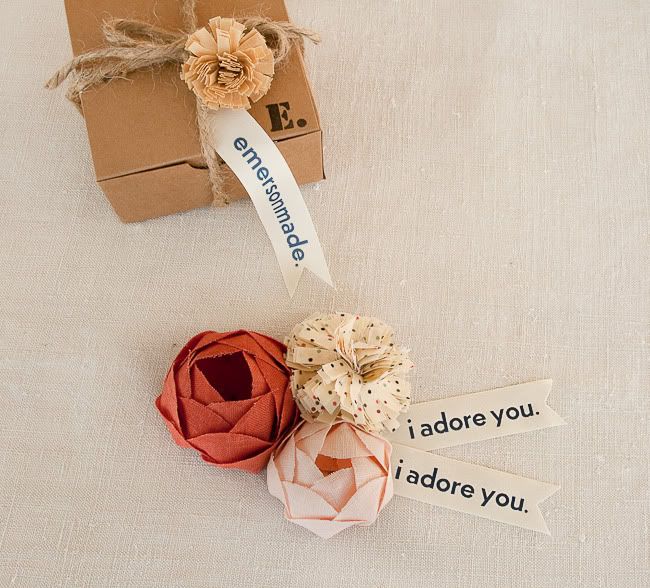
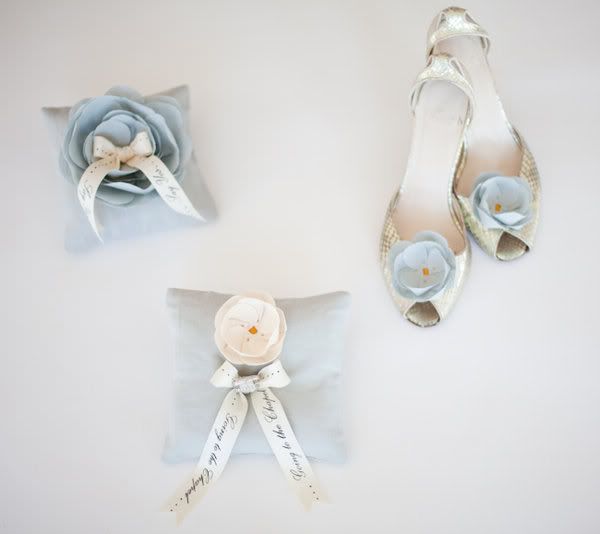
Make sure you check out Emerson's blog which is filled with the most beautiful photos of her stunningly, sweet, soft and oh so pretty flowers. I want to cover my whole house with these pretty, pretties!! I think they deserve two little ♥ ♥'s today!!
- A ♥ goes to Ann from Ann Wood Handmade for her wonderful tutorial on making these paper mache boats:

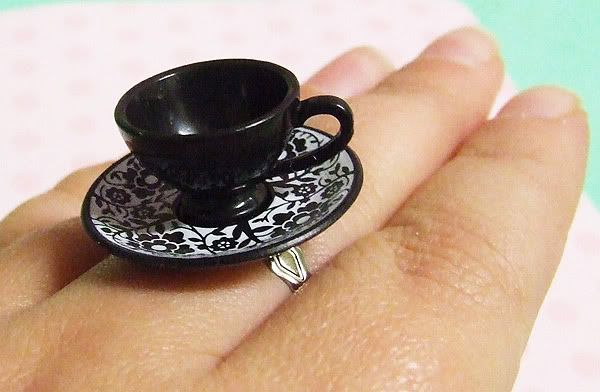
- A ♥ goes to the two talented ladies from Kitty Robot HERE and HERE. They make the cutest little clay goodies and the sweetest little buttons you will ever see! Find out more about them on their blog HERE. Have a look at this cute little ring:
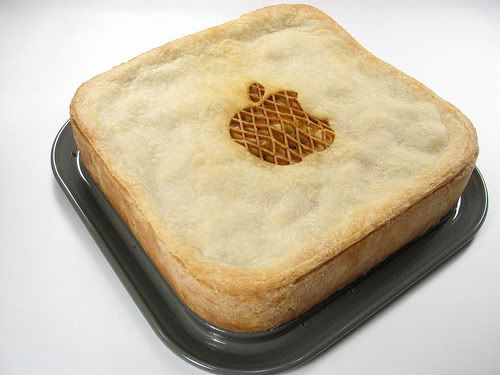
- A ♥ goes to this super funny crafty blog called Geek Crafts! It's so geeky that it's cool...lol!! Here's one of the many tutorial links the blog has to offer - Apple Pie:
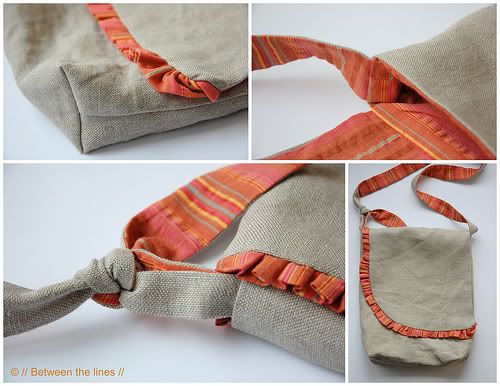
- The last ♥ goes to this gorgeous tutorial by Pascale from Between the Lines on how to make your own messenger bag. I seriously want to make/own one of these:
Hope you find something creative to do this lazy Sunday afternoon!!
I ♥ Faces - Fix-It Friday #51

So, let's take a look at this weeks photo by Allie who wrote "bring out her eyes more and brighten the colors just a bit"

I used actions from My Four Hens Photography in this order:
- Photographer's Tool Box: basic editing
- Color Play: slightly golden
- Photographer's Tool Box: soft pop
- Photographer's Tool Box: eye pop
I added a free texture {can't remember which one, sorry} from one of the many texture flickr group's, over the top and changed the layer to hard light and erased most of the texture from the little girls face, hair, scarf and jacket. That's it!

I will post my "I ♥ Sunday" later this afternoon! Hope you are all having a relaxing weekend full of creativeness!!
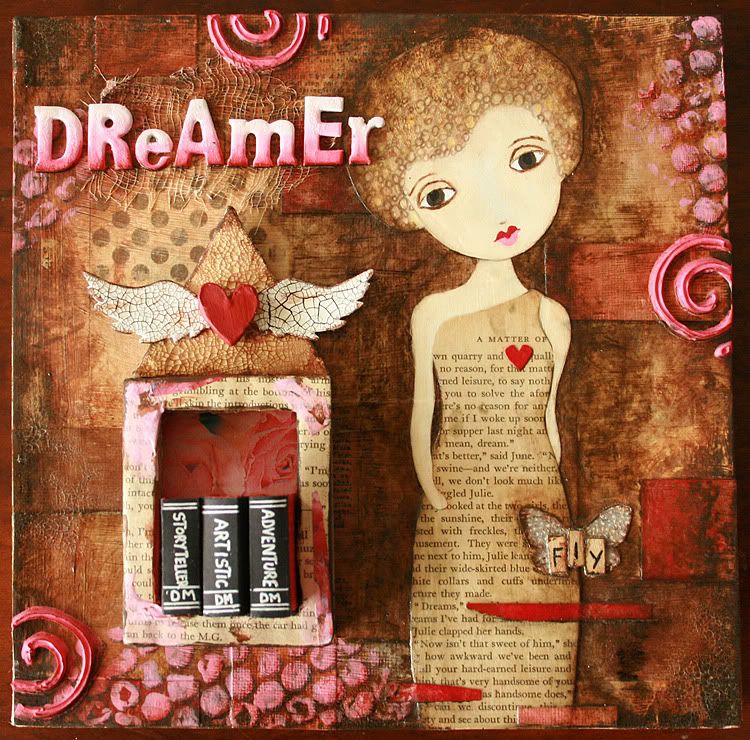
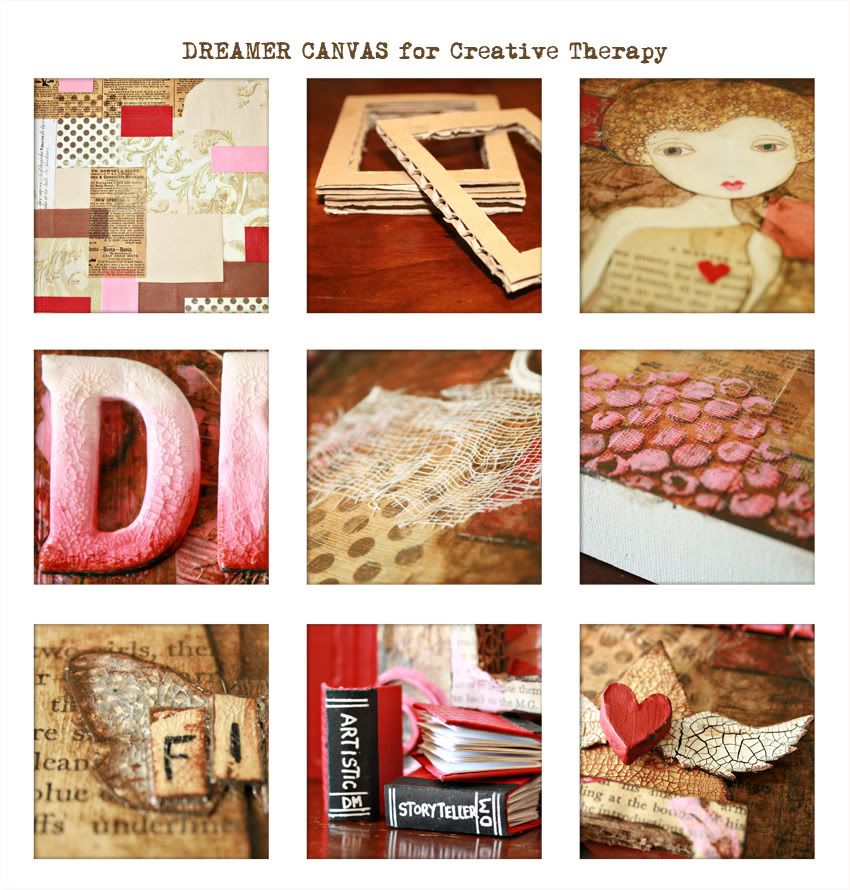
Creative Therapy Guest Artist!!
Firstly, I would like to welcome any new comers to my blog coming from Creative Therapy!!
I can finally share my news with you!!!
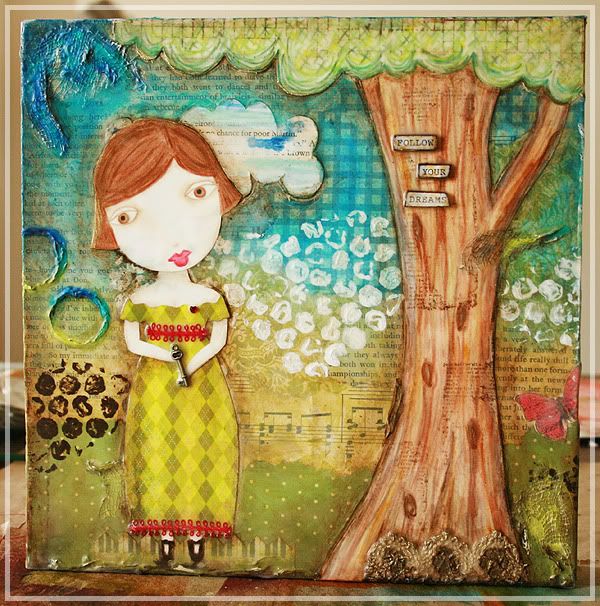
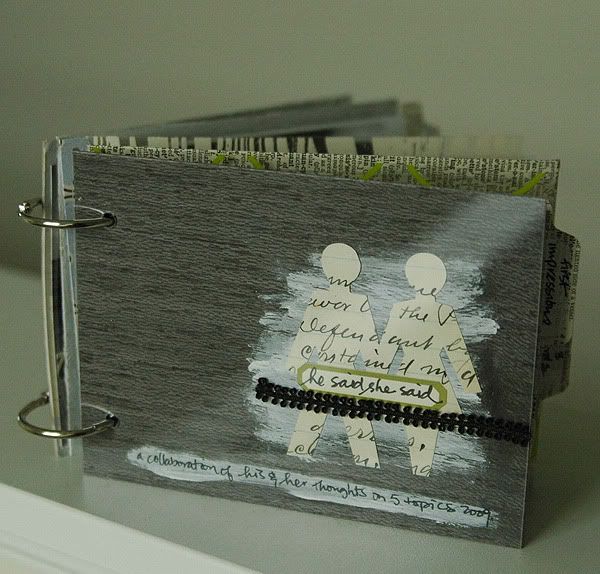
When Karen contacted me a few months ago to be a guest artist for Creative Therapy, I was over the moon excited!! My catalyst question was "How would you describe yourself as a child" I knew straight away that I wanted to create another canvas similar to the one I created for my niece for Christmas:
Giveaway Spotlight
Found this awesome vintage goodies giveaway over on Natalie's blog Scrap Doctor. Look at the yummy goody bag she is giving away:
To see the full list of goodies up for grabs and how to win them, check Natalie's blog post here.
Be Still My Vintage ♥
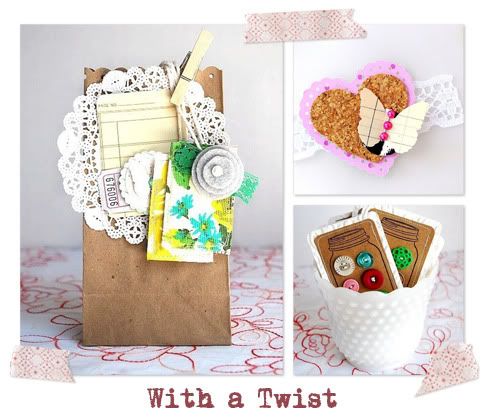
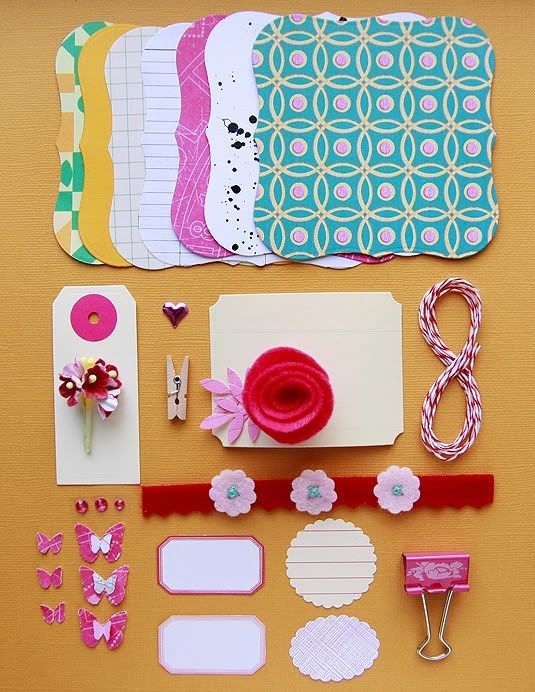
On my travels today I discovered this ever-so pretty Vintage Paper Love kit from With a Twist by Tara Anderson. Have a look at this swoon-worthy prettiness:
I am loving all the other goodies in her store, I want to buy everything!! Three of my favorite items are the Pretty Packaging Kit, Vintage Saturday + Sweet Heart Stickers + Vintage Button Cards below:

I ♥ Sunday
Sunday is my favorite day of the week as I sit at my PC surfing the net, scoping out inspiration and sipping way too much coffee. I want to share with you some of my favorite things I ♥ this week:
- A ♥ goes to this little sweetie {gotta ♥ the name}:
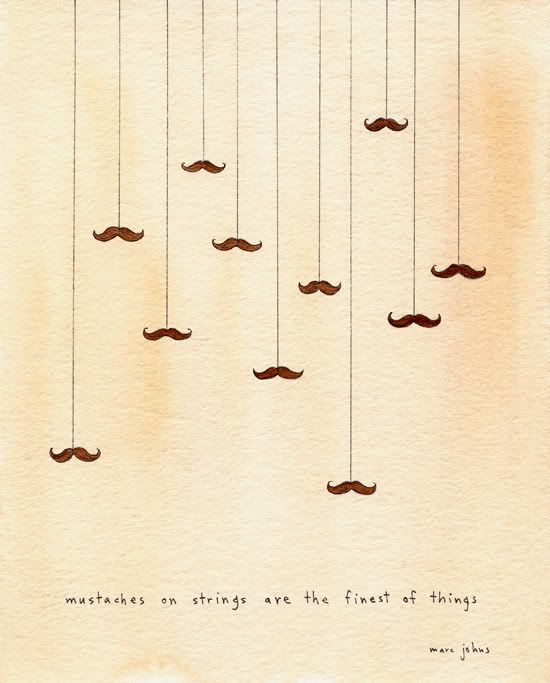
- A ♥ goes to this little giggle-worthy piece of art by Marc Johns:
- A ♥ goes to these awesome acrylic stamps from {kr}:
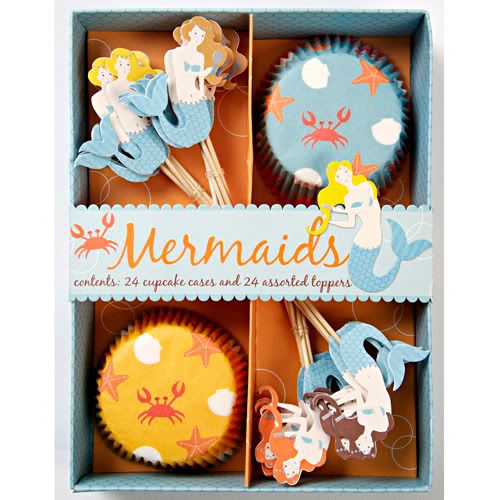
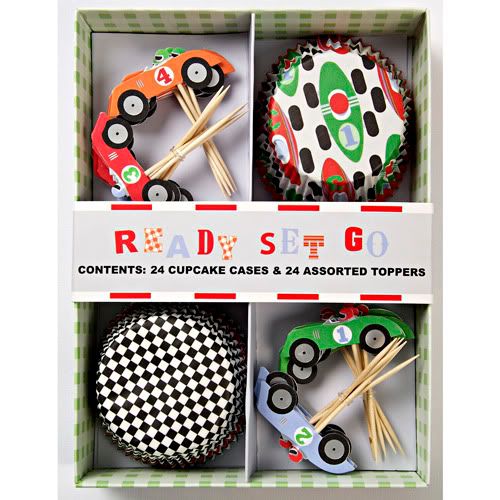
- A ♥ goes to these AMAZING cupcake kits from Meri Meri:
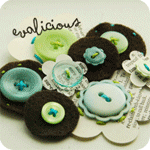
- A ♥ goes to this fun album kit by Evalicious:
- A ♥ goes to the pretty, pretty paper kit Sweet Lily by Belladrummer {sweet Debee Campos}:
- A ♥ goes to Katrina of Pugly Pixel for her fun tutorial on Scalloped Edges on photos:
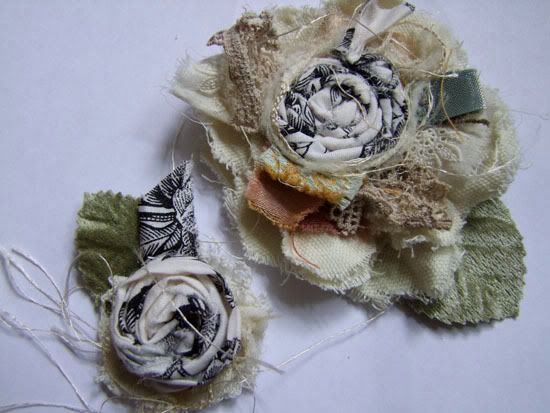
- The last ♥ goes to Roben-Marie's video tutorial on making these shabby-yummy fabric flowers:
I ♥ Faces - Fix-It Friday #50

I played with the curves in CS3, brightened up the eyes and fixed some blemishes, ran my favorite action Eggshell from Freshly Vintage at My Four Hens Photography and added a layer of texture. That's it, here's my version:

Had loads of fun doing this, I think I may have to do this every Friday now......lol!!
That's it for today.......more goodies to show you in the next week....fun, fun, fun!!
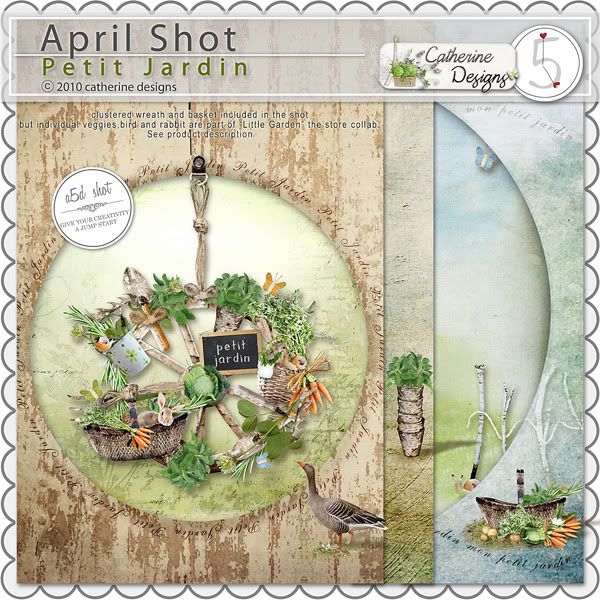
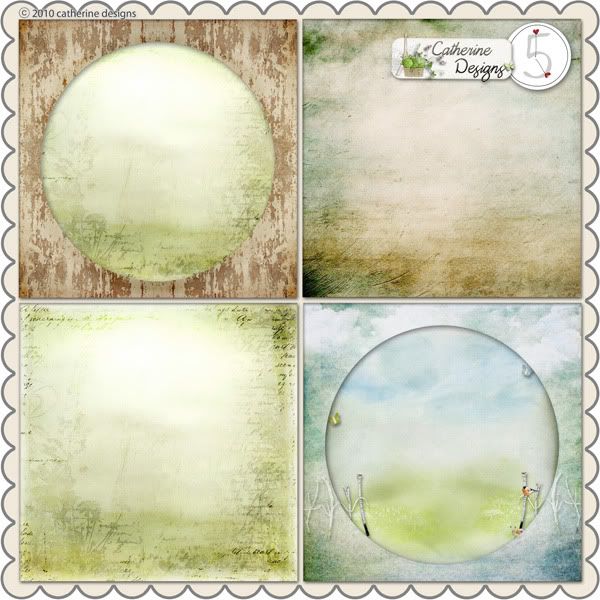
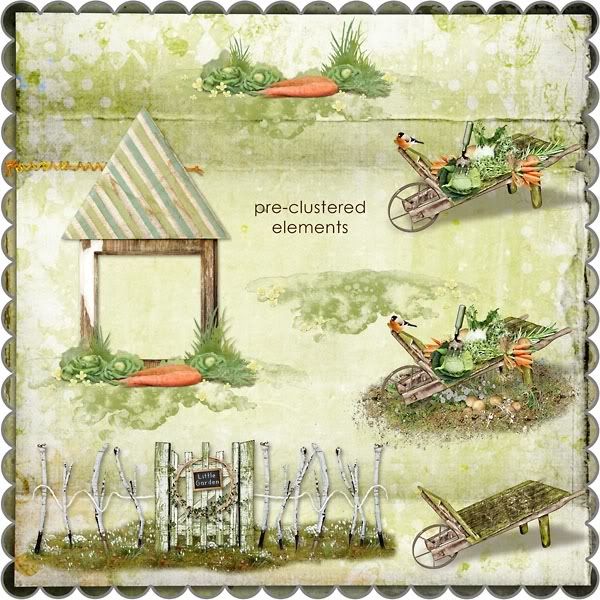
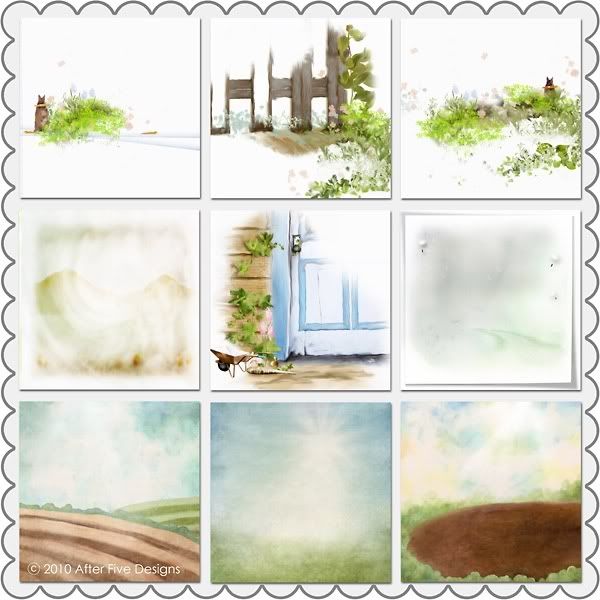
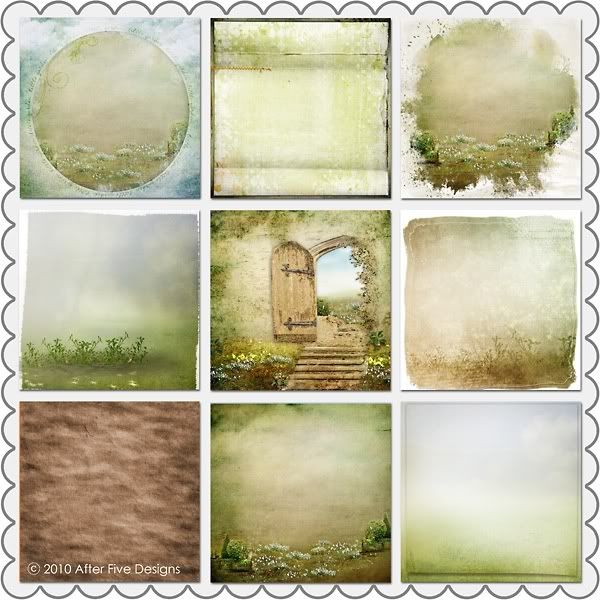
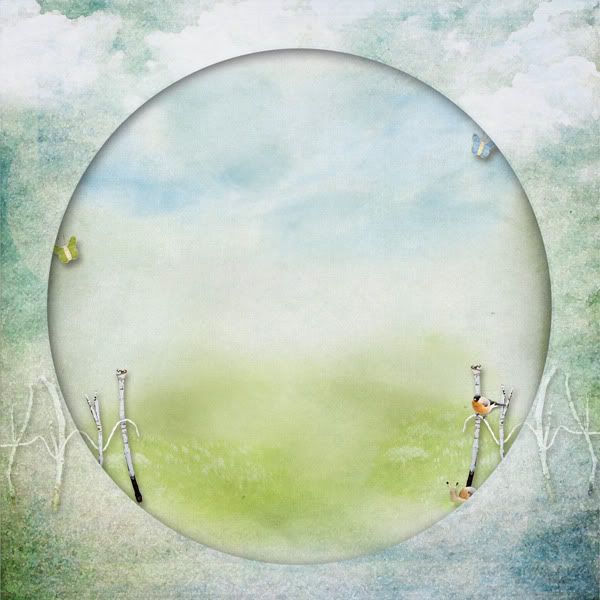
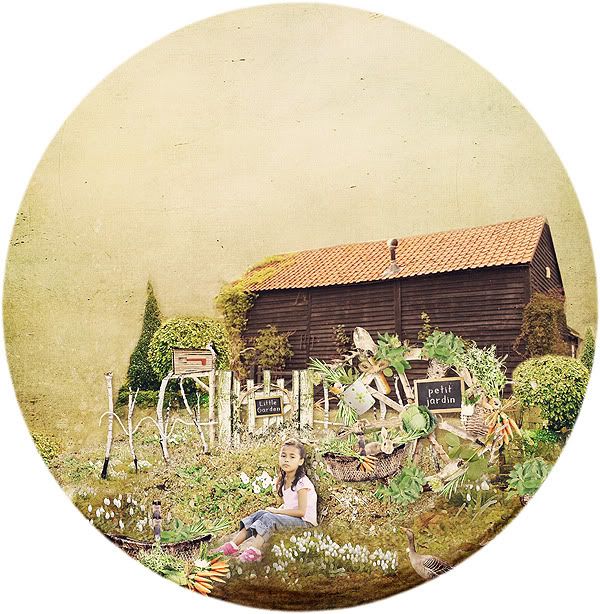
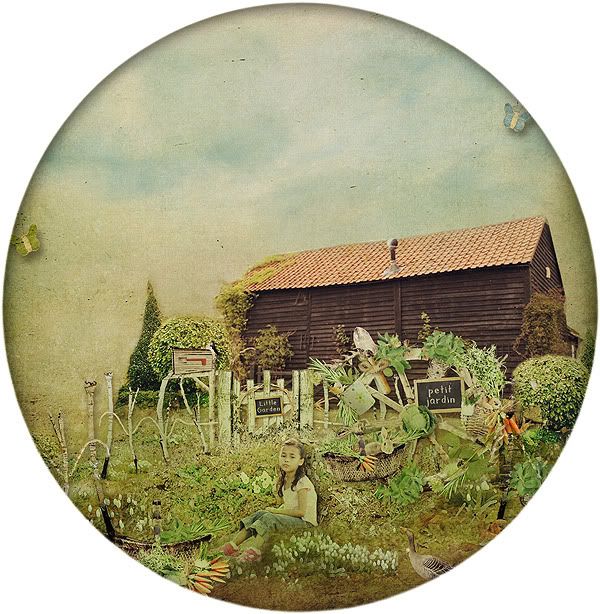
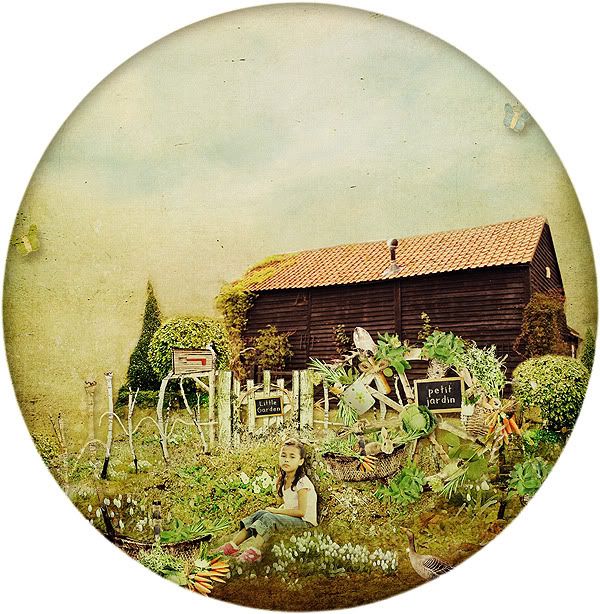
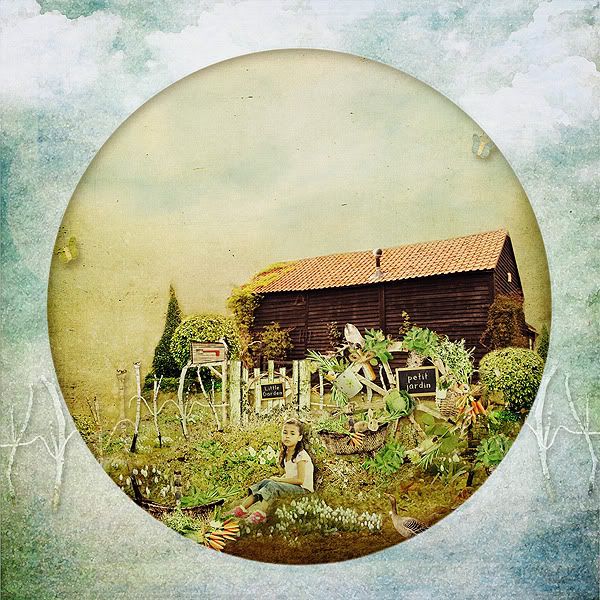
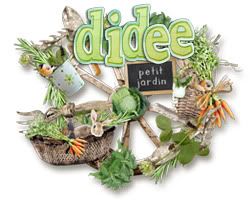
Petit Jardin + A Digital Walk Through
A gorgeous new mini kit Petit Jardin by Catherine Designs from After 5 Designs was released yesterday and I wanted to share a digital page I created using the April Shot as well as using some of Catherine's part of the After 5 Collaboration kit Little Garden:

Can you believe that this mini kit {below} is only $2.00!! Here's what is in Catherine's April Shot:
4 beautifully textured papers ( 12" papers, 300 dpi, .jpg )
1 bird
1 basket
1 herb pot (with one stacked version)
1 bucket
1 duck
3 butterfly (green, blue, orange)
1 wheel ( with a frame version)
1 snail
1 raffia bows
3 garden tools (green, white, orange) 2 'petit jardin' WA
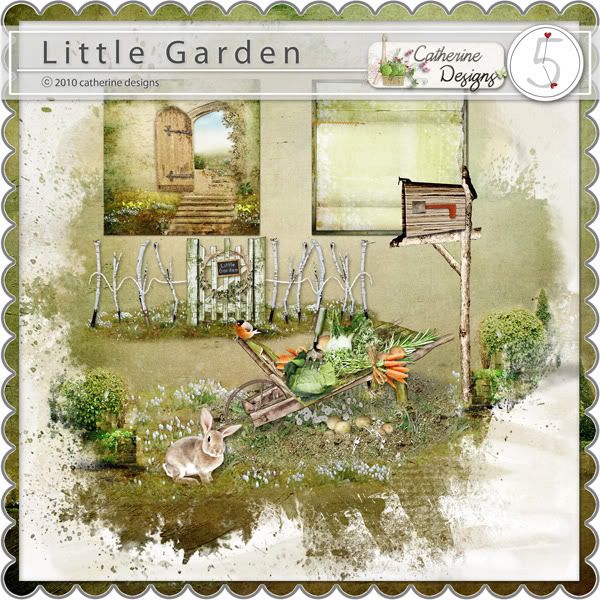
The collaborative kit Little Garden has some of the best digital scrapbooking designer's in the industry including:


.jpg)