In: , ,

Merry Christmas To All!!

Where did the last few weeks go, talk about busy! I had planned to share with you the rest of the Christmas pressies I made for my family but time just flew by in a blink of an eye. I shall have to post them in the new year as we leave tomorrow for a family trip.

I hope everyone has a wonderful Christmas spent with dear friends and family. Merry Christmas from the Martin family xoxo

In: , , , ,

Christmas Gifts - Art Quilt

I wanted to make my sister an art quilt similar to this one but with a neutral color theme so she could hang it in any room she wished. I had so much fun with this doing all of the sewing by hand. Time consuming but loads of fun to play around with different stitches. I really can't sew to save my life so I just googled a few videos on different types of stitches and away I went...lol! Here are the materials I chose:


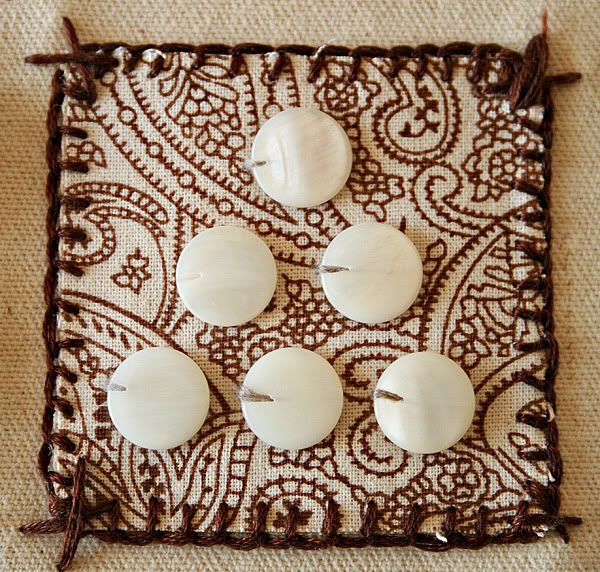
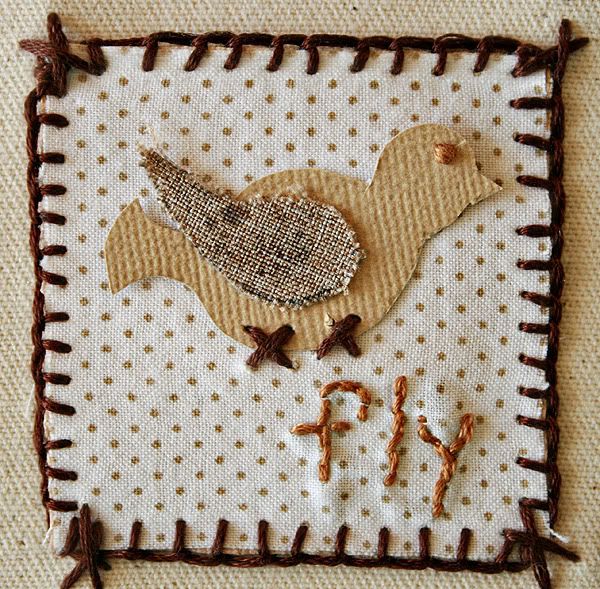
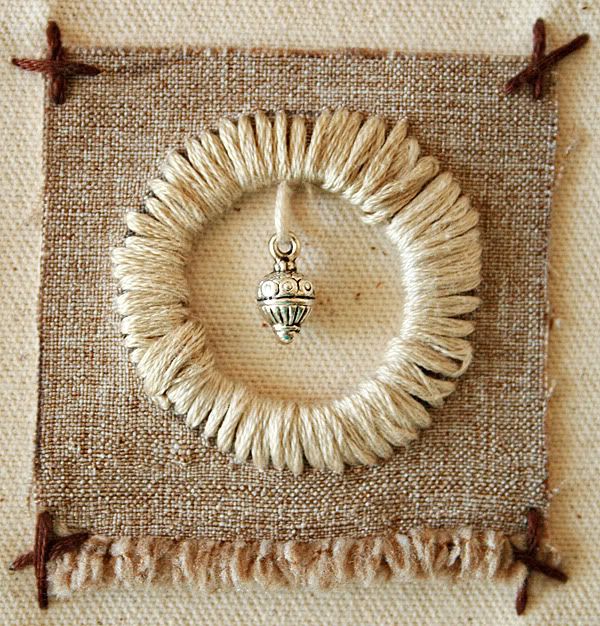
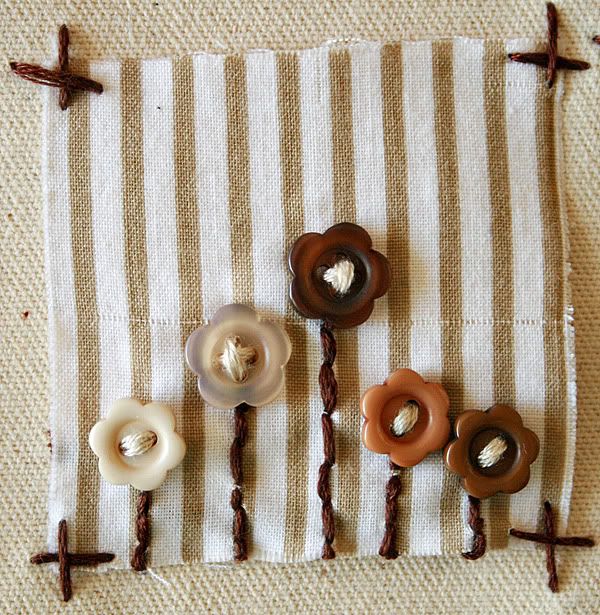
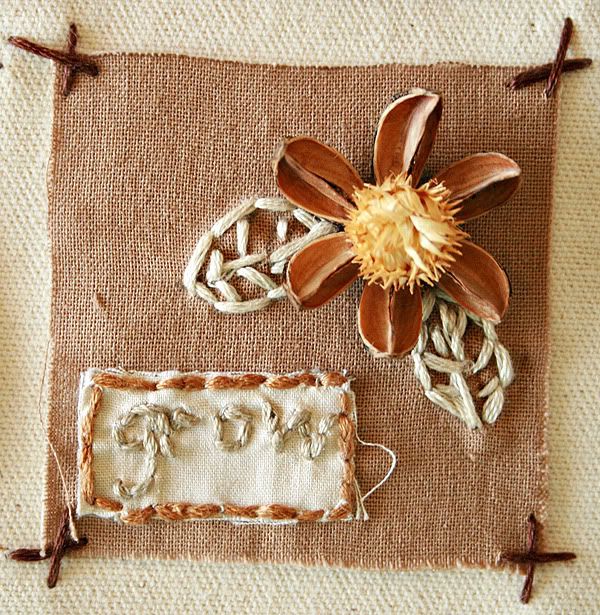
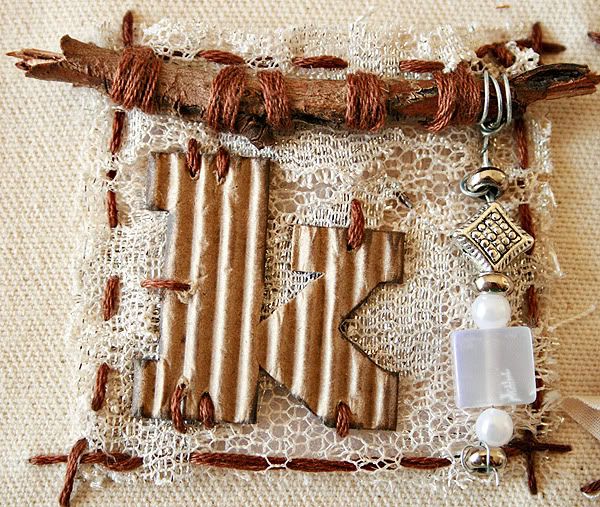
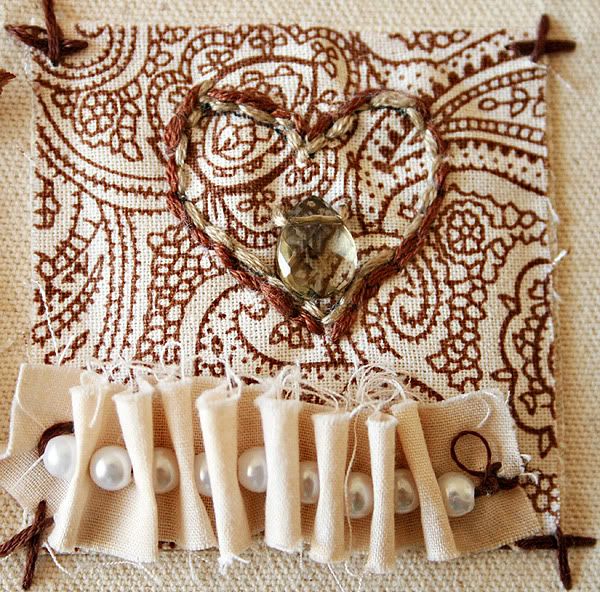
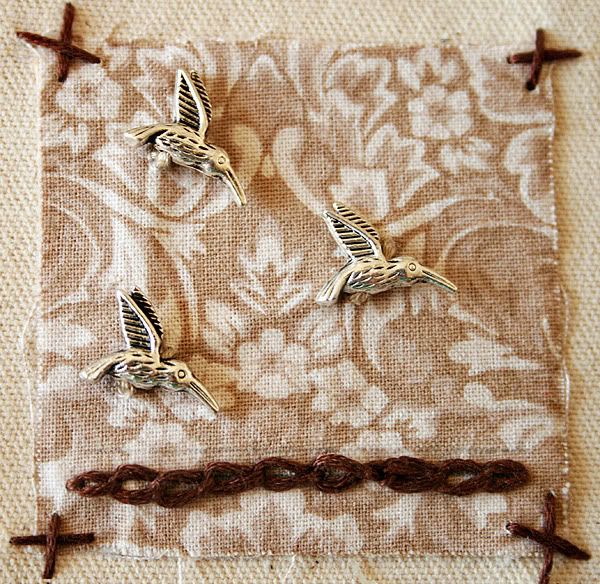
I didn't end up using all of the materials, just  a few patterns I thought went really well together. I have loads left for future ideas, I think I may make a few more of these as I loved the way it turned out. I went with the flow and didn't worry about making any mistakes (one you can see quite plainly......lol) I wanted it to look like I had made it, not purchased it. So some of the stitches aren't straight, I love that it isn't perfect it just adds charm! Here is what the finished quilt looks like:


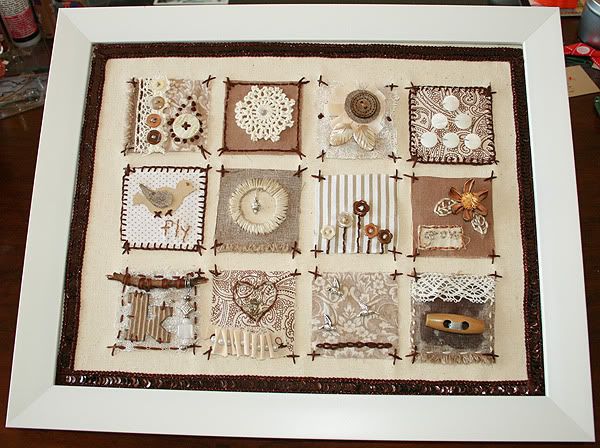
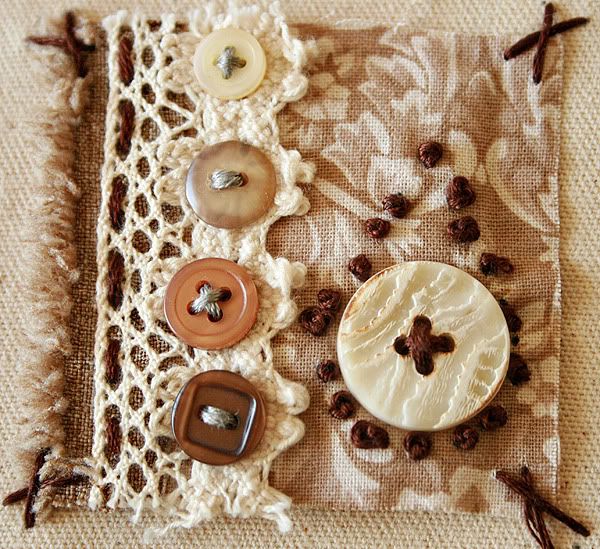
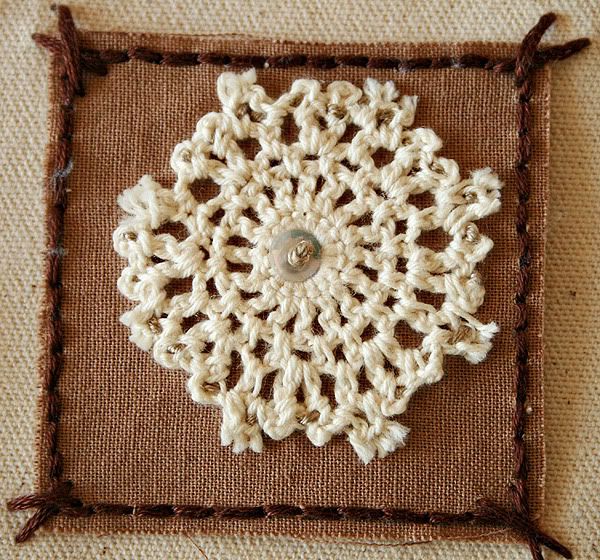
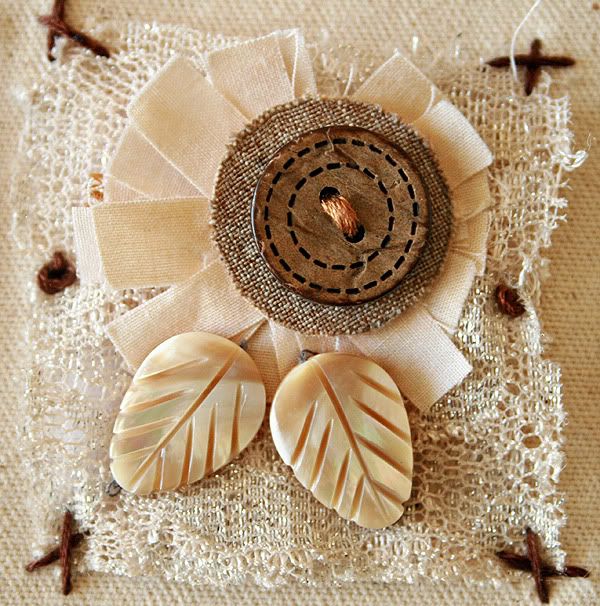
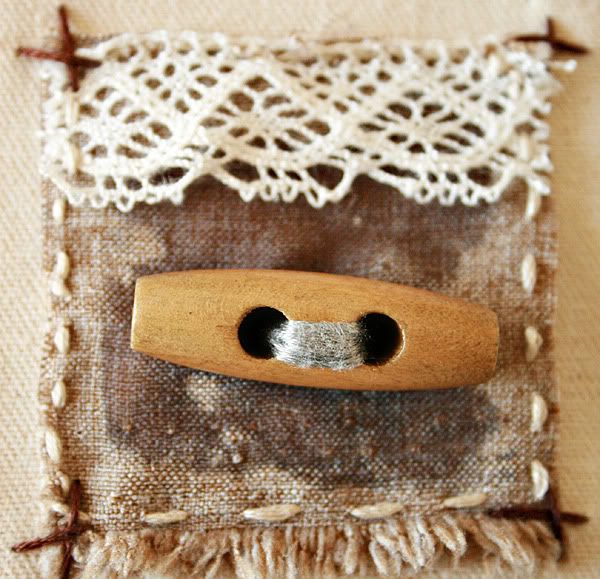
The material squares have all been hand sewn onto canvas and I framed the inside with this gorgeous sequined trim I found in my ribbon stash. The material and the frame are the only items I went out and purchased, the rest of the products I found in my art cupboards. Oh I did go out into the yard to find a twig......lol! Here are some close ups of the individual squares, hope you like them!
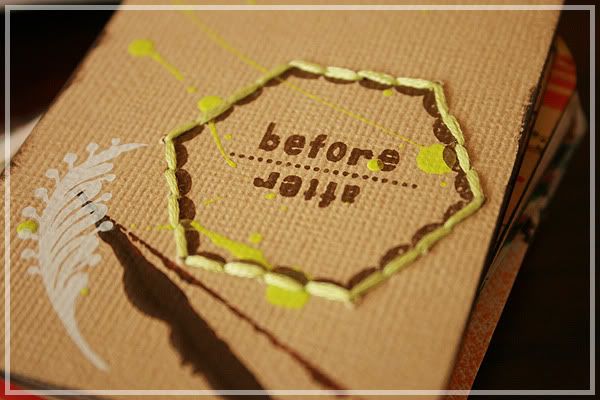
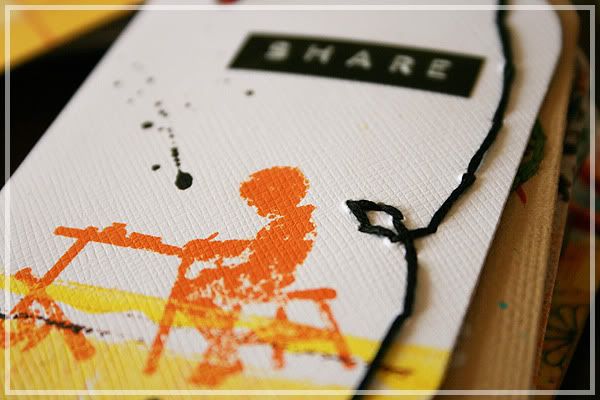
Square 1


Square 2


Square 3


Square 4


Square 5


Square 6


Square 7


Square 8


Square 9


Square 10


Square 11


Square 12


As always, if you have any questions leave me a comment or send me an email. You can find the email link on the right towards the top of my blog. Hope you're having a creative week!

HAPPY HUMP DAY!! xoxo

Inspirational ATC's

I was so inspired to make some inspirational ATC's by Ronda Palazzari. She has a link to the tutorial on her blog called Loads of Layers v2.

I pulled out all of my Kenner Road kits (9 months worth) and went through them using loads of papers and embellishments. I mixed spray inks, paints, all my KR stamps, patterned papers, embellishments and embroidery floss and here are the results:


Of course some of them I love and will even use them on other projects as they are. I used many different styles that I wouldn't normally use on a page but it was fun putting them all together not worrying if I was going to ruin them. I loved that I went out of my comfort zone and try different things. Ronda gives you so many inspirational idea's to help build those layers up and I LOVE layers especially in digital scrapping. It can be a little hard to layer 20 flowers onto of each other on a traditional page not that I have tried mind you, I just can't picture that in my head...lol! Here are some of my favorite one's:


This one, I used some punchanella from Roben-Marie Smith's store. She sells a gorgeous little pack with loads of different sizes and colors for $4.49 USD! HEART this stuff!!


I am in love with the chair stamp!


I used some glimmer mist on this one but you have to move it around to see the glimmer. I only have the one color of the mist as I wanted to be sure I liked the effect before I got loads of them in different colors. Loving them now.


Love this stamp as well!


Love embroidering things at the moment.


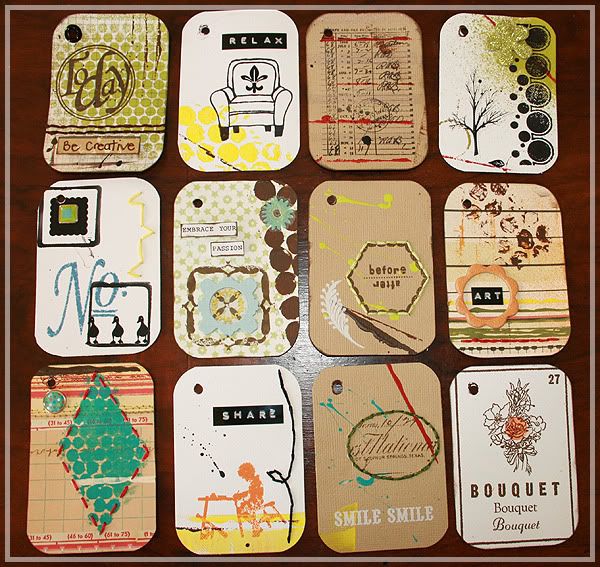
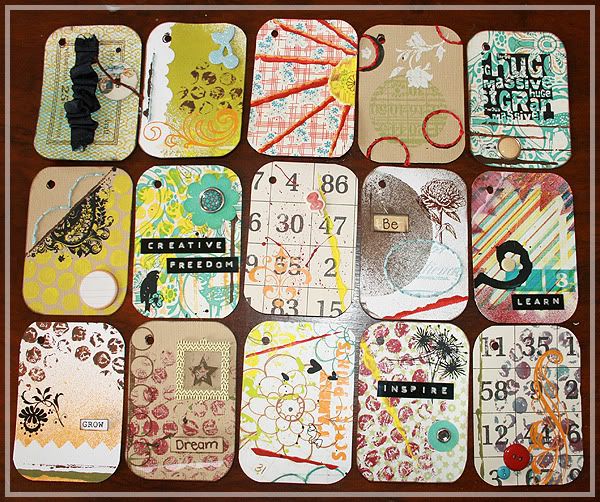
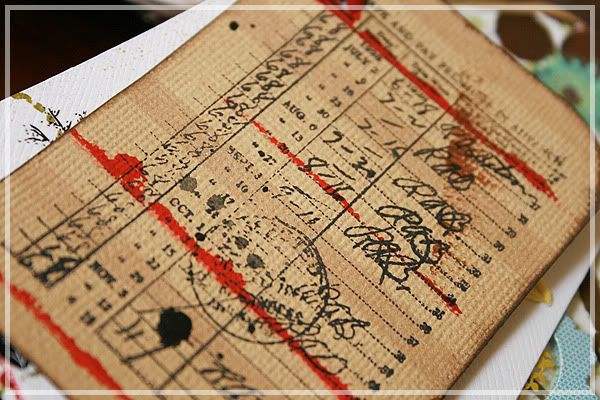
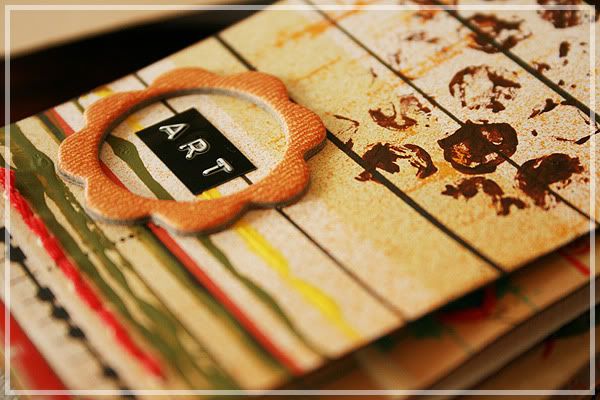
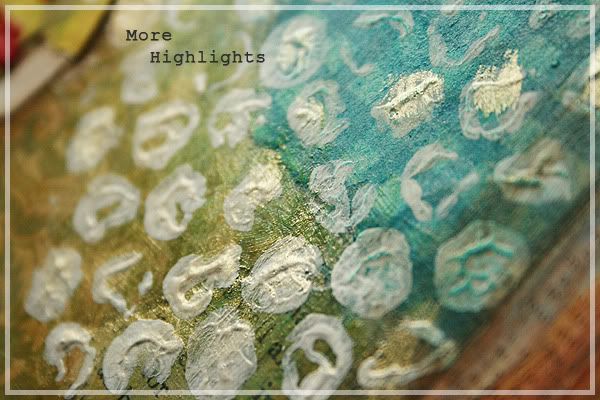
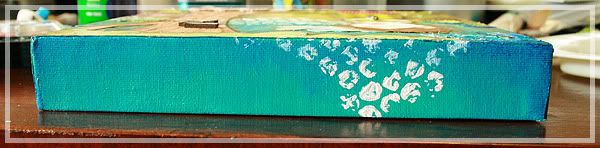
You can't beat bubble wrap as a stamp!


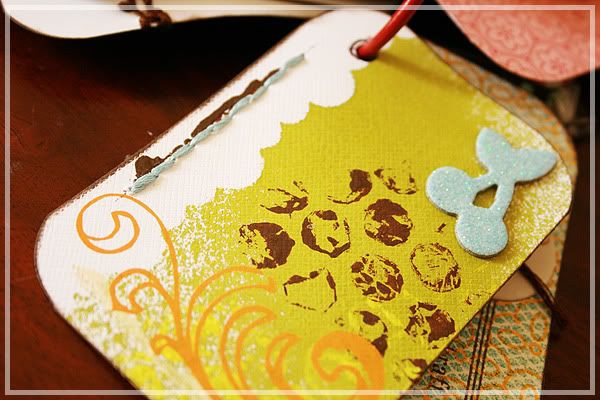
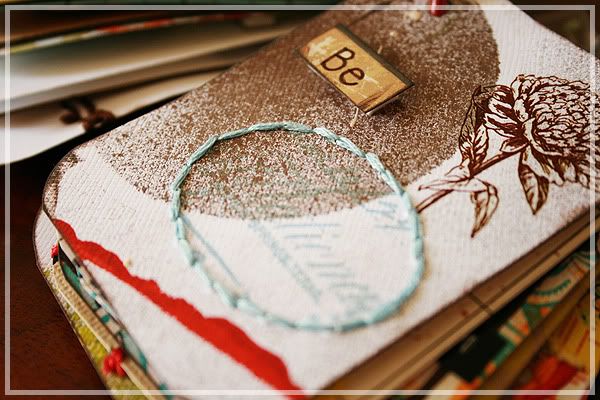
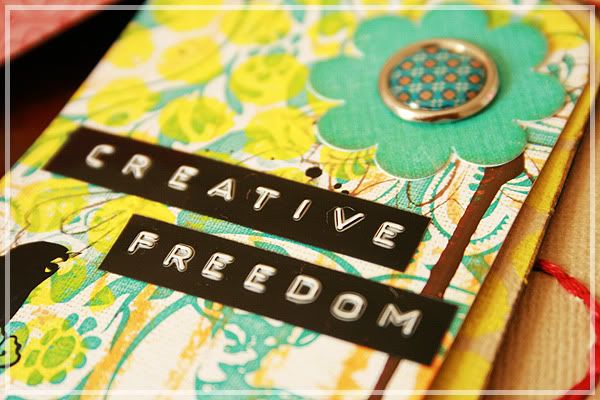
I LOVE the way this last one turned out, the mesh mist, the JB chipboard button, the vintage ribbon and the KR stamp on a gorgeous yellow paterned paper! DIVINE

I could keep going with loads more photos but I suggest you give this a go. I have mine hanging on the wall next to my PC so I can see them all the time and play with them. None of the ATC's were planned out, I just gathered all the supplies I wanted to use, surrounded myself with them and went to town on each card. I will definitely be doing this again in the near future. It's a great way to inspire yourself as well as using up any bits and pieces you have laying around which we all know you do, right!

GO MAKE SOME NOW
xxoo

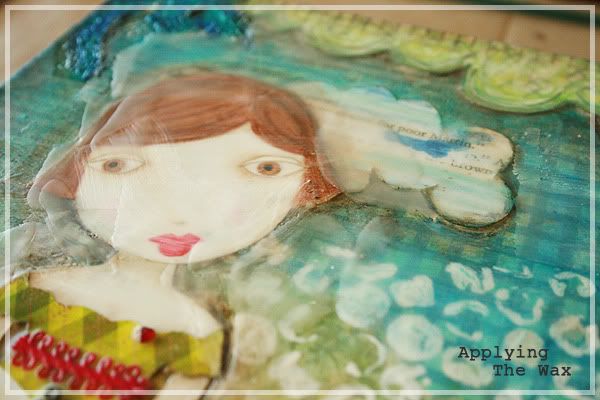
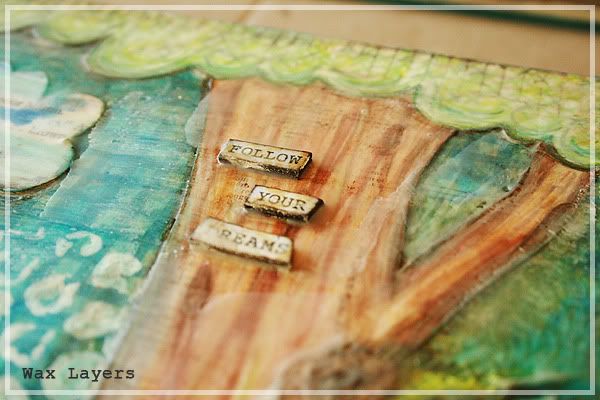
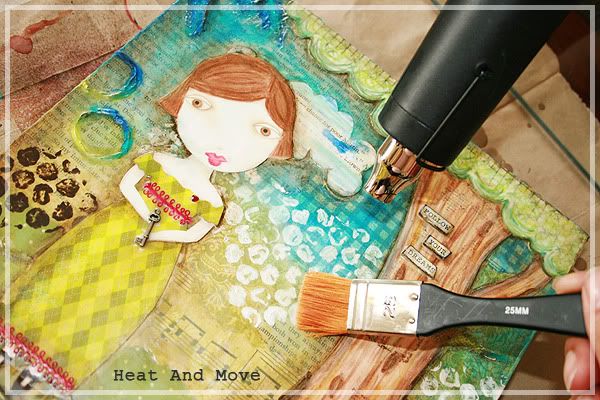
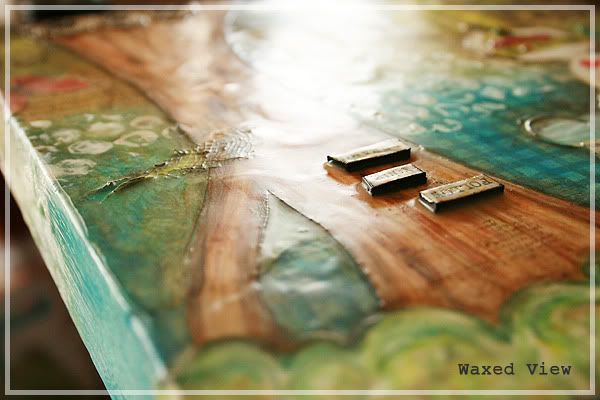
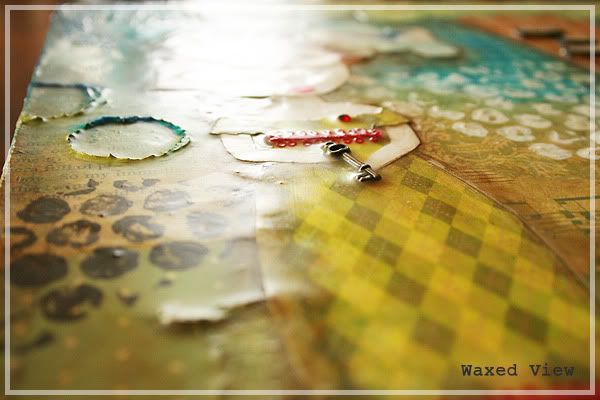
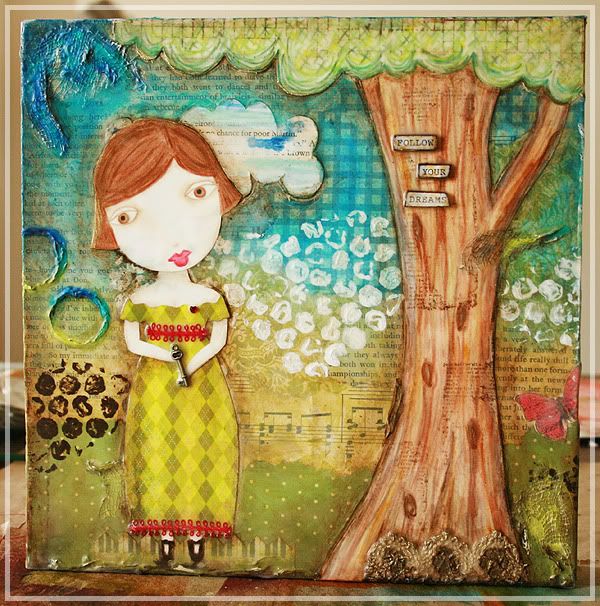
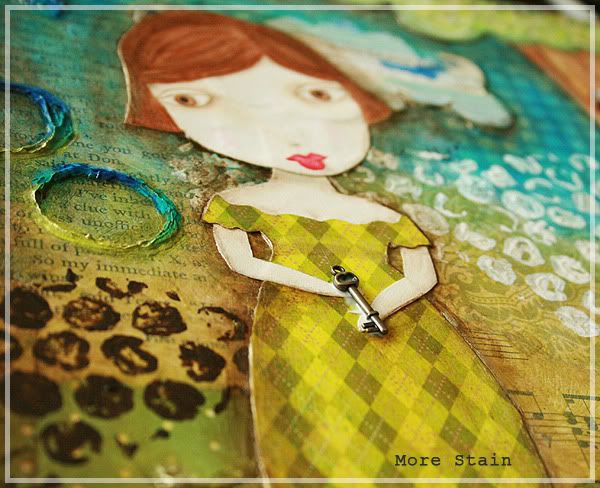
Christmas Gifts - Mixed Media Canvas Part 7: Final

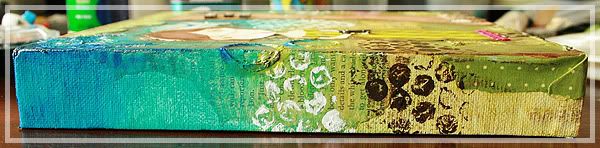
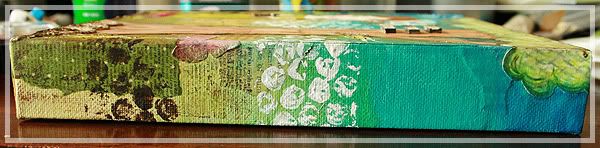
Continuing on from the last post.... A canvas for my niece Miss C. This is the final part of the Mixed Media Canvas, hope you liked it!


Preparing To Wax: This stage is so much fun, I love playing with wax! There are quite a few types of waxes you can used and many ways to melt it but I just grabbed a packet of white (bleached) beeswax from my local art store. That's all I could find so I made do. You can purchase different types of beeswax and in different forms. I was on the hunt for a block of natural beeswax but I didn't want to wait for it to come via snail mail.

Melting The Wax: I have an old cake tin that I use for melting my wax with my heat gun. Quick and easy! You could also used an old slow cooker to melt your wax or a melting pot. I use a flat wide brush to apply the melted wax, it spreads the wax out better.


Applying The Wax: Once my wax was melted I applied short strokes over the entire canvas. As it was beginning to dry I could see where more wax was needed and I applied more. Don't worry about any brush marks in the wax as the heat gun will take care of that next.


Heat & Move: Once the wax had started to dry, I noticed a few places where the wax had pooled so I took my heat gun and remelted these parts. Using my brush I pushed the puddles around the canvas till I was happy with the thickness of the layer of wax. I had to do this a few times to get an even coat of wax over my canvas. I used the heat gun to slightly melt other sections of the canvas to get rid of the brush strokes that showed up in the wax. No need to completely melt the wax, just a few blows with the heat gun is enough to give the wax a lovely sheen.


Waxed Views: Sorry about the photos above, it was hard to get a good photo of the finished layer of wax. As you can see the wax has softened the edges and given the canvas a very slight dreamy effect. The layer of wax also seals, protects and holds onto any embellishments (like the key) that are attached to the canvas.

You can take this step further by scratching or cutting into the wax and rubbing ink or a diluted paint mixture into them to add yet another layer of goodness. I have tried this with Tim's Walnut Stain and a little of raw umber acrylic paint mixed with a little glossy gel medium. The results are gorgeous. I chose not to on this canvas as I was happy with the overall result and thought this would be more of what my niece would like. I can always introduce her to some dirty art later on.

Well, that brings me to the end of this tutorial, I do hope you enjoyed it and found some inspiration along the way. Maybe even discovered something new....lol! If you have any questions, please don't hesitate in leaving me a comment or even sending me an email. I would love to hear from you! You can find my email below my profile.
Lastly, here is the finished canvas:


GET CREATIVE, LEARN NEW THINGS!!! xoxo

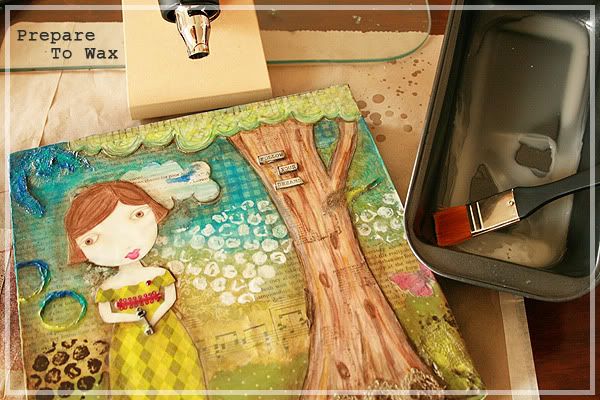
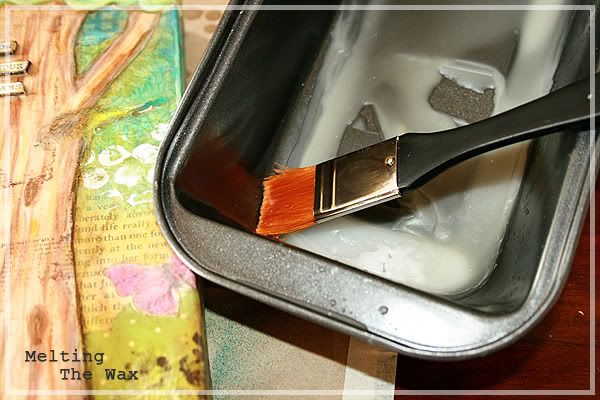
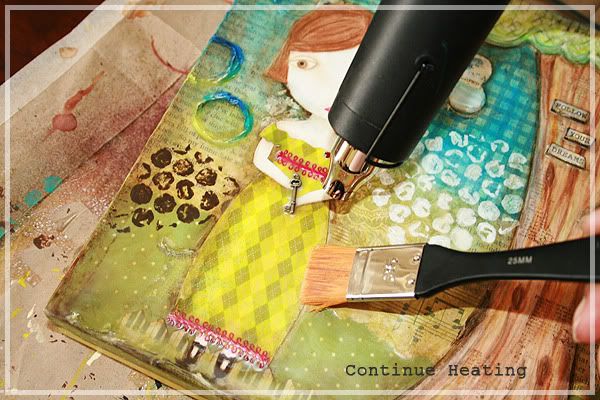
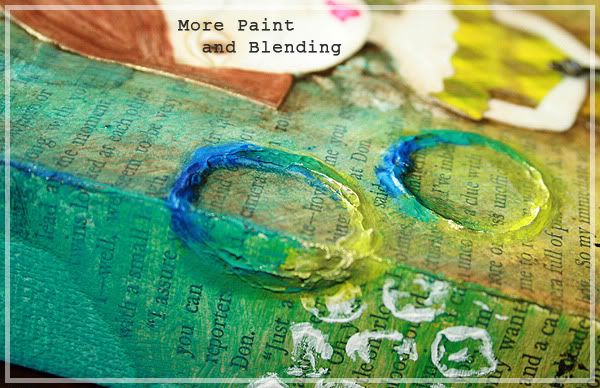
Christmas Gifts - Mixed Media Canvas Part 6

Continuing on from the last post.... A canvas for my niece Miss C.

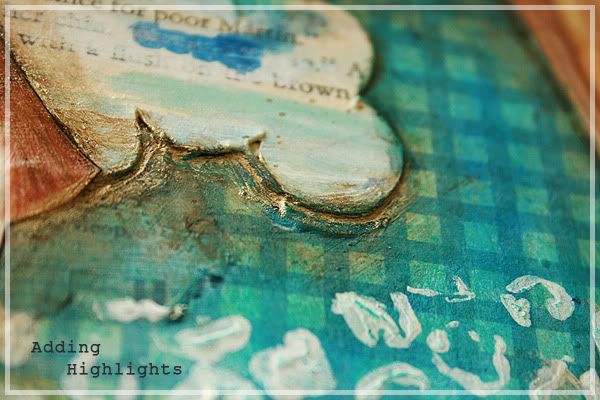
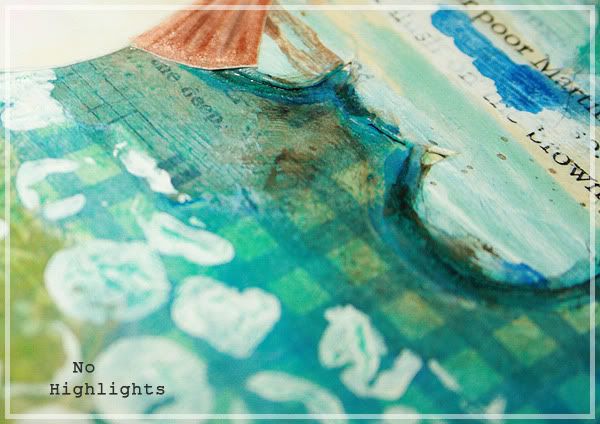
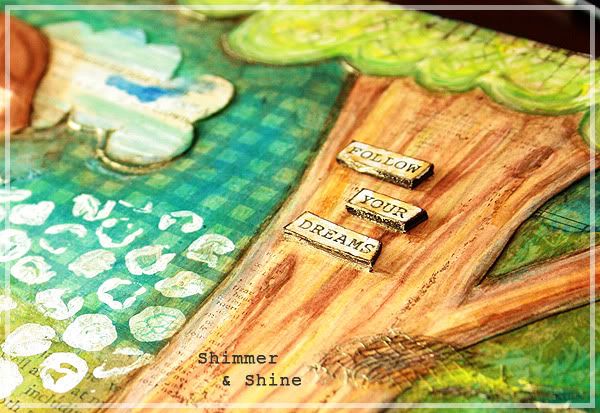
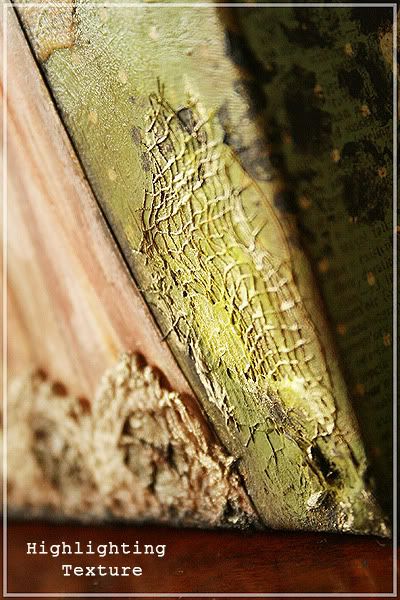
For this post I want to concentrate on adding highlights to the canvas and touching up any area's that I thought needed that little bit extra.


I just want to jump in here and talk about the differences in the two photos above.

Adding Highlights: There are quite a few products out there such as iridescent paints like Jo Sonja's Iridescent Colors that you can use for highlights on your canvas. I did find another one called FW Pearlescent but I haven't tried this one yet. I chose to use an Iridescent Gel by a French company called Pébéo. You can mix this gel with almost any acrylic color to give it a pearlized or iridescent effect or it can be used alone which is what I did. It goes onto the canvas as an off white color but when it's dry it becomes more iridescent. 
In the top photo you can see that the gel is quite gold and add's real depth in the cracks but compare it to the next photo from a different angle and the appearance changes. I chose to use some brush strokes (you can really notice this in the second photo) to apply the gel in some places as well as using my finger to blend out the edges in other sections of the canvas. 
Here is an excellent example of the difference between adding highlights and leaving them out.


Notice how much depth the top photo has compared to the bottom photo which has no highlights. Amazing isn't it!


More Highlights: I used my brush and my finger to add more highlights and depth to various parts of my canvas paying close attention to the raised up area's left by using texture paste and gesso. Most of the time I choose to use gesso instead of white paint as most of the time I like to add another layer. With gesso being a primer it's perfect for me to add layers over it and build them up if I want to.

Shimmer & Shine: In the last photo you can just see the area's that have highlight's as they shimmer and shine from different angles. You can see that I have added the iridescent gel to the bottom of the tree's canopy, around the bottom of the cloud, underneath the word bits and a little in the grooves of the gauze.


The Sides: I only added light touches to the sides of my canvas such as adding more dark blue slightly watered down and blended it in well with my fingers. A few raw umber accents on the tree trunk and along the edges of the green spotted paper.


Guess what.....we are about to go onto the last stage of how I completed this canvas and this part is loads of fun! See you back here tomorrow for the last part of my mixed media canvas for my sweet niece Miss C.


CREATIVE MESS = ART   xxoo


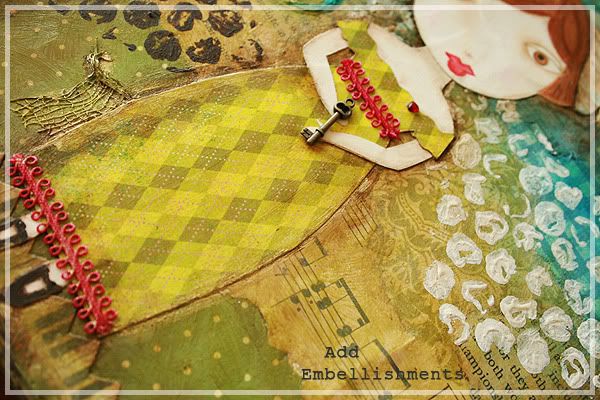
Christmas Gifts - Mixed Media Canvas Part 5

Continuing on from the last post.... A canvas for my niece Miss C.


Stain Around the Doll:  Now that the canvas is completely dry after adding the doll, I made up another mixture of a small amount of raw umber and loads of gel medium and added a stain around the doll making sure I didn't get any on the dolls face.

More Painting and Blending: Seeing that the canvas dried for a full 24 hours, I noticed some area's needed a little more definition so I added some more undiluted acrylic paint to the texture paste circles I created in a previous step (part 3). Remember to blend your colors so they flow seamlessly from one color to the next. I added some of the stain I used for around the doll, into the inside of the circles using my finger to blend it in to create even more shadow and depth. Notice in the above photo how the top of the circles look much higher than the rest of the circle.

Inspirational Words: I wanted to make sure that the words or phrase I used tied the whole canvas together and I definitely wanted something that a teenager would/could relate to hence the words 'FOLLOW YOUR DREAMS'. I adhered the printed words onto a thick layer of chipboard, inked the edges with my favorite color ink Pinecone then adhered them to another layer of chipboard and inked again. I added some distress ink Antique Linen over the top of the words to dull the white of the photo paper the words were printed on.

Add Embellishments: Time to break out some of my favorite scrapbooking supplies. I always find somewhere to add a little 7 Gypsies key. I HEART keys! A key says to me "You hold the key to unlock...." (insert so many different words and phrases that the key can represent to you). I also added some ribbon trim to the dress to make her look even prettier and a tiny little jeweled heart on her chest. I really had an urge to add a bookplate, another one of my favorite embellishments but as they say 'less is more' even though that only works some of the time in my opinion...lol! So I left the bookplate off, it really had no place on this canvas, maybe if I had used a single word I could have used a bookplate. I am happy with the result any way.

We are finally nearing the end now and I am starting to get excited to see the finished product. More photos and guides tomorrow.

CREATE OUT OF YOUR COMFORT ZONE... You won't regret it! xxoo

Blog Widget by LinkWithin