
Posted by
Diana Martin
In:
art,
canvas,
Christmas,
drawing,
hand made,
inspiration,
mixed media,
painting,
petite doll,
tutorial,
walk through
Christmas Gifts - Mixed Media Canvas Part 6
Continuing on from the last post.... A canvas for my niece Miss C.
For this post I want to concentrate on adding highlights to the canvas and touching up any area's that I thought needed that little bit extra.
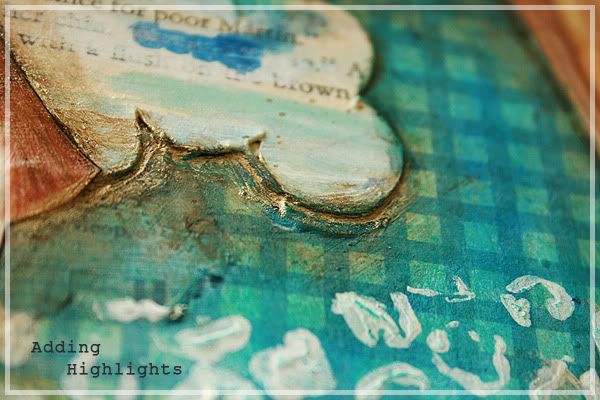

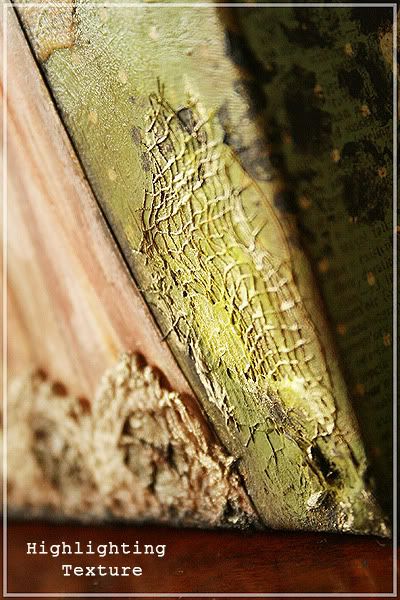
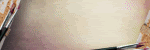
I just want to jump in here and talk about the differences in the two photos above.
Adding Highlights: There are quite a few products out there such as iridescent paints like Jo Sonja's Iridescent Colors that you can use for highlights on your canvas. I did find another one called FW Pearlescent but I haven't tried this one yet. I chose to use an Iridescent Gel by a French company called Pébéo. You can mix this gel with almost any acrylic color to give it a pearlized or iridescent effect or it can be used alone which is what I did. It goes onto the canvas as an off white color but when it's dry it becomes more iridescent.
In the top photo you can see that the gel is quite gold and add's real depth in the cracks but compare it to the next photo from a different angle and the appearance changes. I chose to use some brush strokes (you can really notice this in the second photo) to apply the gel in some places as well as using my finger to blend out the edges in other sections of the canvas.
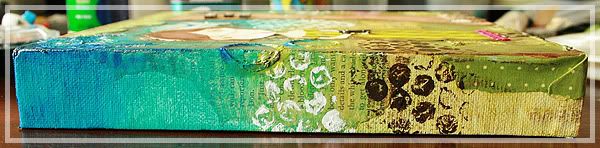
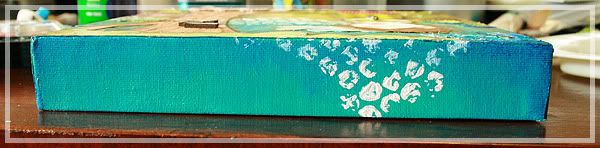
Here is an excellent example of the difference between adding highlights and leaving them out.
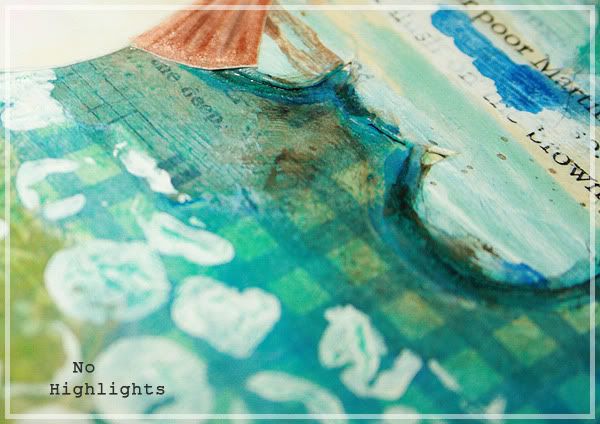
Notice how much depth the top photo has compared to the bottom photo which has no highlights. Amazing isn't it!
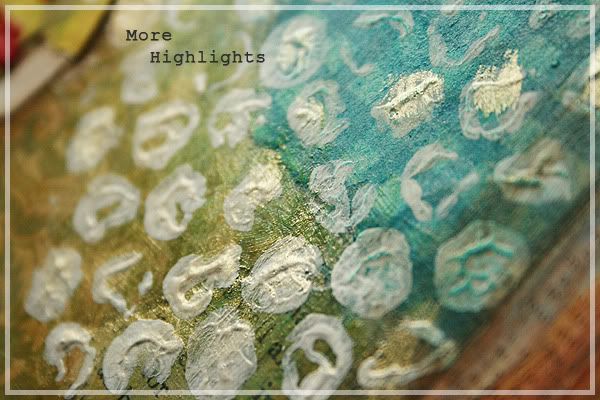
More Highlights: I used my brush and my finger to add more highlights and depth to various parts of my canvas paying close attention to the raised up area's left by using texture paste and gesso. Most of the time I choose to use gesso instead of white paint as most of the time I like to add another layer. With gesso being a primer it's perfect for me to add layers over it and build them up if I want to.
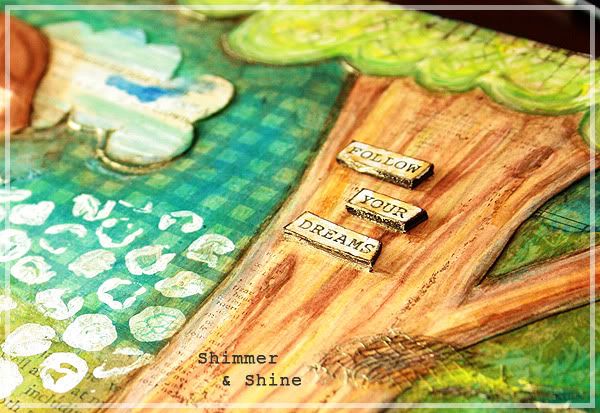
Shimmer & Shine: In the last photo you can just see the area's that have highlight's as they shimmer and shine from different angles. You can see that I have added the iridescent gel to the bottom of the tree's canopy, around the bottom of the cloud, underneath the word bits and a little in the grooves of the gauze.

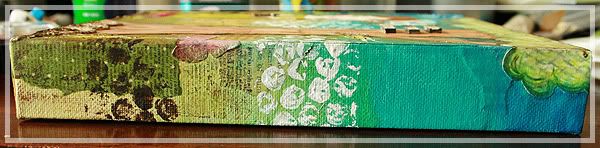
The Sides: I only added light touches to the sides of my canvas such as adding more dark blue slightly watered down and blended it in well with my fingers. A few raw umber accents on the tree trunk and along the edges of the green spotted paper.
Guess what.....we are about to go onto the last stage of how I completed this canvas and this part is loads of fun! See you back here tomorrow for the last part of my mixed media canvas for my sweet niece Miss C.
CREATIVE MESS = ART xxoo
Subscribe to:
Post Comments (Atom)


.jpg)


2 comments:
Girl, you know what?? I have never gotten into the whole hybrid thing but you sooo make me want to try it. You are the best artist on here Di!!! WOW! You just simply bloody AMAZE me girl, each and EVERTIME I look at your works of art!!!!!!
Hope ya having an AWESOME weekend!!
Bigggg Hugs & Kisses,
Tara xoxoxoxoxoxoxo
I recently came across your blog and have been reading along. I thought I would leave my first comment. From board room meetings to conferences for up to 150 delegates, NSW south coast accommodation offers the perfect environment for a business getaway. Comfortable country style accommodation,comprehensive audiovisual and business facilities, and nature’s playground right outside your front door.
Post a Comment