Posted by
Diana Martin
In:
update
I Have Missed You!

{♥}
Yes, I am a terrible blogger! However, I do have a good reason.
For those of you who know me and read my blog often, you will know that I care for my disabled Mum full time and that she lives with me and my two girls. For the most of last year, she has been slowly losing the ability to walk. Just walking through the house or standing up for a few minutes was beginning to cause her extreme pain. So after numerous appointments and tests over the last few months, the specialist informed us that Mum's legs were dying partly due to her diabetes.
After more testing with the vascular specialist {who visit's our country/rural town once a month} on Mum's legs and stomach, they found major blockages in her arteries in her lower stomach which was stopping the blood flow, down to her legs. His first suggestion was to have a few stents inserted into her arteries at a cost of around $10,000 - $12,000 a stent which we would have to pay as the specialist only operates in a private hospital an hour away. So that was pretty much out of the question for us. Our second option was to have balloons inserted to widen the arteries to help the blood flow down to her legs. The balloons are around $900 each. We would only have to pay $300 each and the rest would be covered by medicare.
The procedure took place in February and everything went well until last month when we noticed that one of her legs would swell up so much it looked like her skin would split open. If Mum keeps her legs elevated, the swelling seems to go down. We are due to see the specialist on the 7th of May to get some more tests done to see if the balloons are doing their job.
So, that's where we are at right now.... ♥


Posted by
Diana Martin
In:
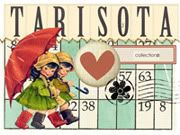
Tarisota
A Call for Recipes

Tamar, the owner of Tarisota, is asking for contributors for the recipe book for 2010. So if you would like to contribute a recipe, be sure to check out the details on her blog and email her at tarisota@optusnet.com.au
From Tamar's blog:
Each year through December we create a fun and very popular downloadable recipe book.
This year not only will the downloads be available daily but at the end of the month the recipes will also be collated into an E book for sharing on Issuu. I have just created the 2008 and 2009 versions.http://issuu.com/tarisota/docs/christmas-2009
http://issuu.com/tarisota/docs/a_compilation_of_christmas_recipes

Posted by
Diana Martin
In:
giveaways
Free Florabella Holiday Card Templates

Florabella has a freebie and a GIVEAWAY… Also, be sure to help spread the word about the Free Florabella Cards & have a chance to win a $100 gift certificate toward Florabella Photoshop Actions, Textures, Vintage Frames, etc. (3 winners)! Just post about the free cards on your blog, Facebook wall, forums, etc. and leave a comment ON HER BLOG each time you share. Make sure your post includes a link to her original post… Three winners ($100 each) will be randomly chosen from the comments and announced on Wednesday, Dec 1st!
Subscribe to:
Posts (Atom)


.jpg)