A Trip Down Inspiration Lane
Welcome to the very first addition of 'A Trip Down Inspiration Lane'!
When ever I get the chance to create something whether it is a hybrid, traditional or digital project, I will be sharing it here on my blog with hints, tips or tricks I have discovered along the way. I hardly ever get a chance to create something but when I do, I never end up posting it to galleries so all my little projects remain on my shelf or tucked away in the scrapping cupboard.
So I was laying in bed last night with my eldest DD who had really bad pains in the tummy, (she's on the lounge now playing her wii all rugged up in her lounge/sick blanket) thinking about the projects I create and what I can do with them. That's how I came up with 'ATDIL' A Trip Down Inspiration Lane!
Now lets see if I can explain my thoughts on this little inspirational section of my blog.
I spend a huge chunk of my life on the computer (when I'm not being a mum that is) surfing the net, working and creating. Along the way, I always find so many inspirational idea's that I bookmark for future reference. I have loads of different categories in my inspiration bookmark folder, to help keep them sorted. I have one particular folder that is filled with links to sites that I have found amazing idea's for all types of projects. This is what I would like to share with you. Anything I create using the vast inspirational sites I have compiled, I will post on my blog. Such as the original project I found, my interpretation of the project, and links needed to complete the project for yourself and mini tutorials on how I created my own project. I will also show you my own mini tutorials on what I create myself so that you may be inspired yourself, to create a project. I will be keeping everything fairy simple so if you are at the beginner level, you will definitely be able to create your own inspirational pieces!
Now don't get me wrong, I am no professional by any means but I'd love to share with you what I learn on my journey down inspiration lane.
With out further ado, here is my first little project:
A Timeless Tag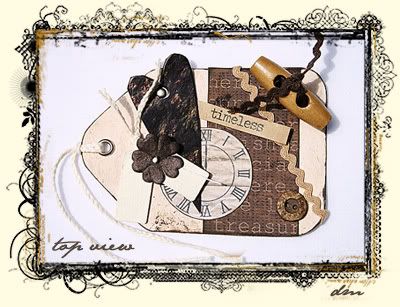
Tags can be so much fun to create and there are no guidelines you have to adhere to. Just create what you feel like and use any materials you would like.
My supply list
Digital Products:
- Cherish Every Moment by Gina Marie Huff at Weeds and Wildflowers
- Tag template HERE
Physical Products:
- Versa Color Pinecone Ink
- Ric rac, string and ribbons from Jindyandy
- Eyelet from Spotlight
- Brad from Spotlight
- Buttons from my button stash
- Strip words by Collections
- Chipboard tags by Collections
- Paper flower by Bumblebee Crafts
Let's get started. Open the template you downloaded above in photoshop. Open an new 8x11 pixel transparent document at 300 resolution. Drag your template over to the new document. Open your digital embellishments and papers you wish to use on your tag. Resize your paper to 8x8inches.
Drag your paper over to your new document and position it over your tag. Right click on the paper layer and create a clipping mask.
Resize any other embellishments you wish to use on your tag and place these items on your new document ready to print out.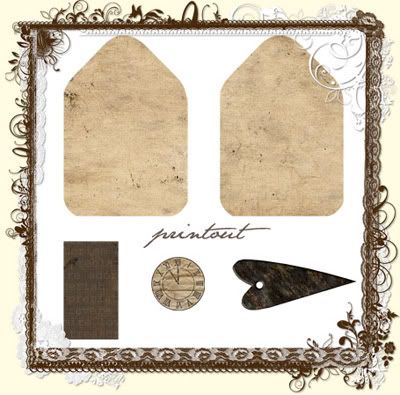
* NOTE: Go here to read a basic tutorial on how to print from photoshop.
Now you are ready to print out your tag and start putting it together. Use any embellishments you wish to decorate your tag. Here is my finished tag: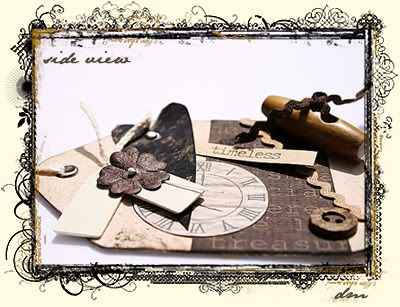
ENJOY! xo
Frames used in previews are by Rhonna Farrer from House Of 3. Click on image below to go to the shop!
This entry was posted on Monday, March 02, 2009
and is filed under
ATDIL
,
freebie
,
Hof3
,
inspiration
,
Rhonna Farrer
,
tag
,
template
,
tutorial
.
You can follow any responses to this entry through
the RSS 2.0 feed.
You can leave a response,
or trackback from your own site.

























.jpg)


1 comments:
Hi Diana,
Thanks for visiting my blog. LOVE yours and this tag is amazing, Girl! (great tutorial too) I'm just getting the whole digi thing down. I will be visiting you often!
Lisa
Post a Comment